MettaXIoT for Desktop
MettaXIoT for Desktop supports multi-channel live monitoring, video replay and video privacy masking for IoT devices.
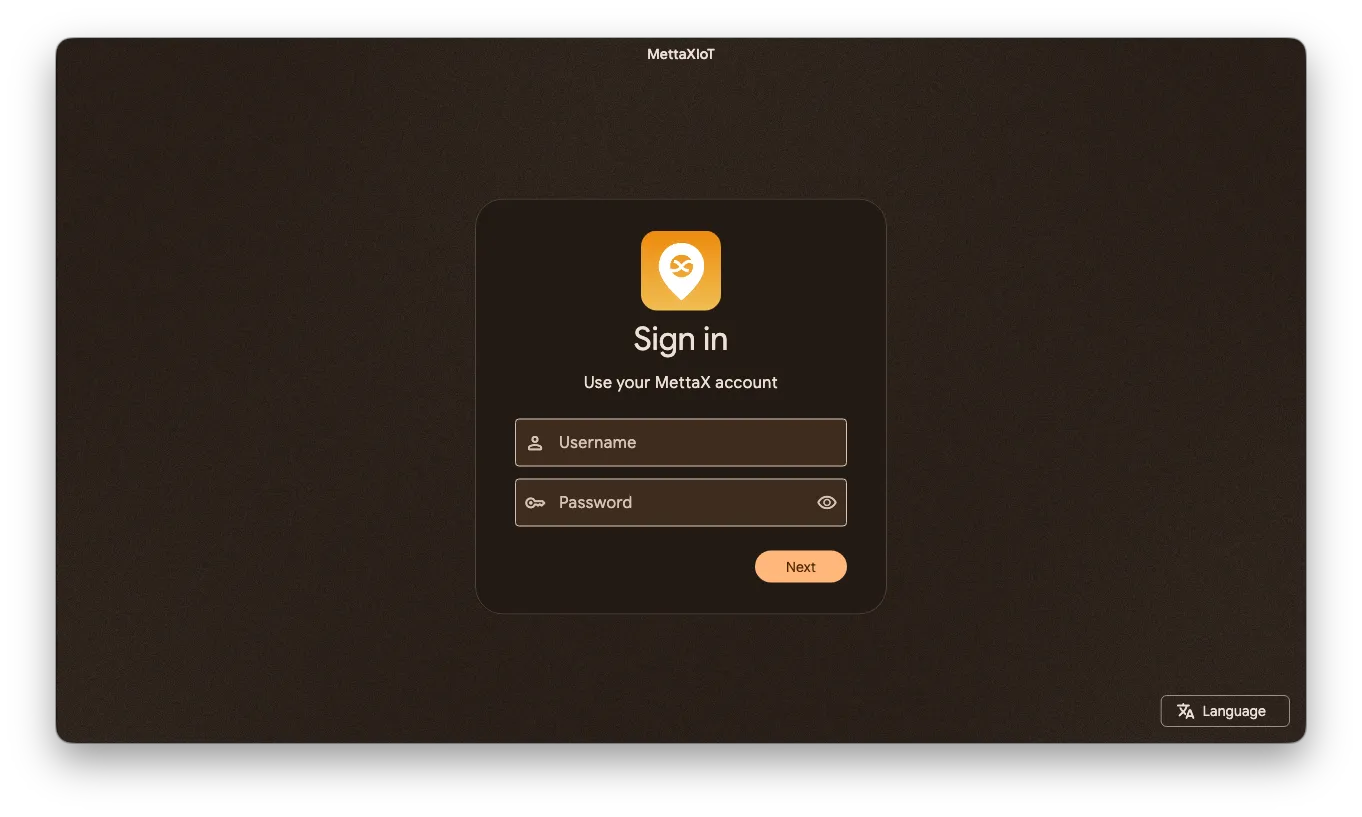
Only customer main accounts can log in. Enter your main account credentials. You can switch languages at the bottom.
Main Navigation
Section titled “Main Navigation”After logging in, there are five navigation entries on the left side:
| Module | Description |
|---|---|
| Customers | View customer hierarchy and select a specific customer |
| Monitor | View device distribution and status on a map |
| Live | Customizable multi-channel live streaming grid |
| Replay | Watch historical segments, upload and download |
| Downloads | Background download task management |
The device list for the current customer appears beside the navigation bar, with keyword search and device status filters. Use the sidebar button at the top of the window to hide or show the list.
Customer Management
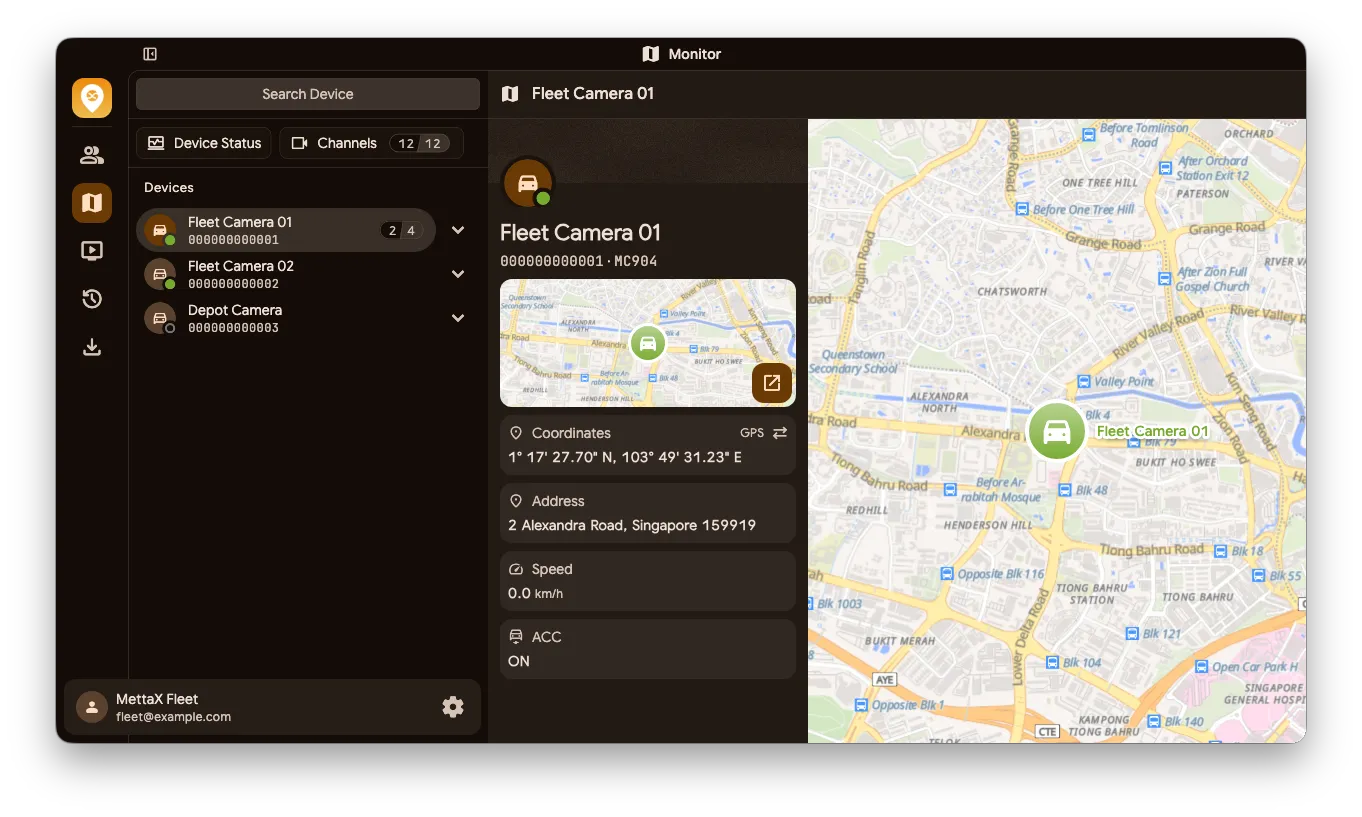
Section titled “Customer Management”A tree structure displays the customer hierarchy. After selecting a customer, the device list updates automatically.
Monitor
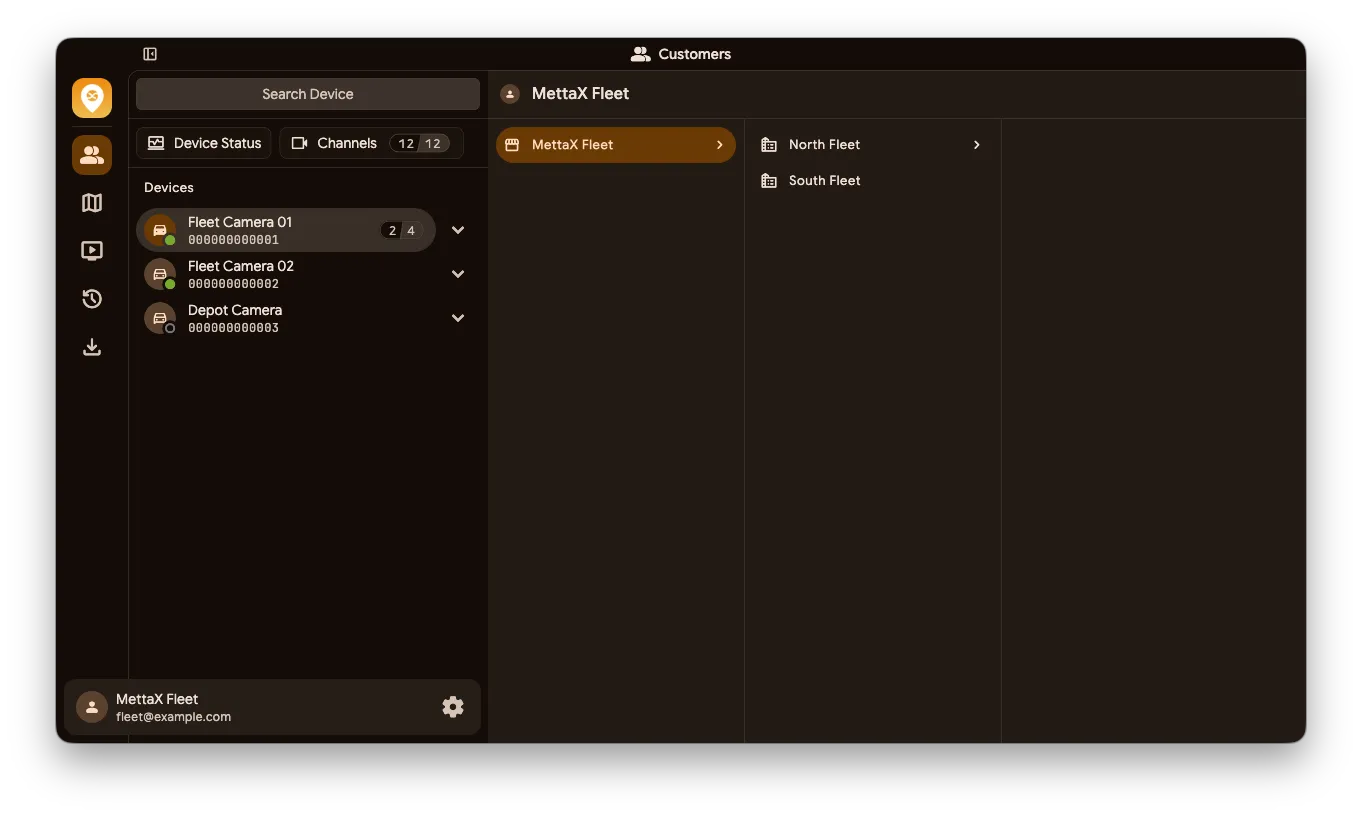
Section titled “Monitor”Numbered markers on the map indicate how many devices are in that area. Click a cluster marker or zoom in to see individual device locations. Click a device marker to view its real-time status.
Multi-Channel Live Streaming
Section titled “Multi-Channel Live Streaming”View channels from multiple devices in one grid. Use live modes, playable channels and pinning to choose which feeds to watch.
Live Mode
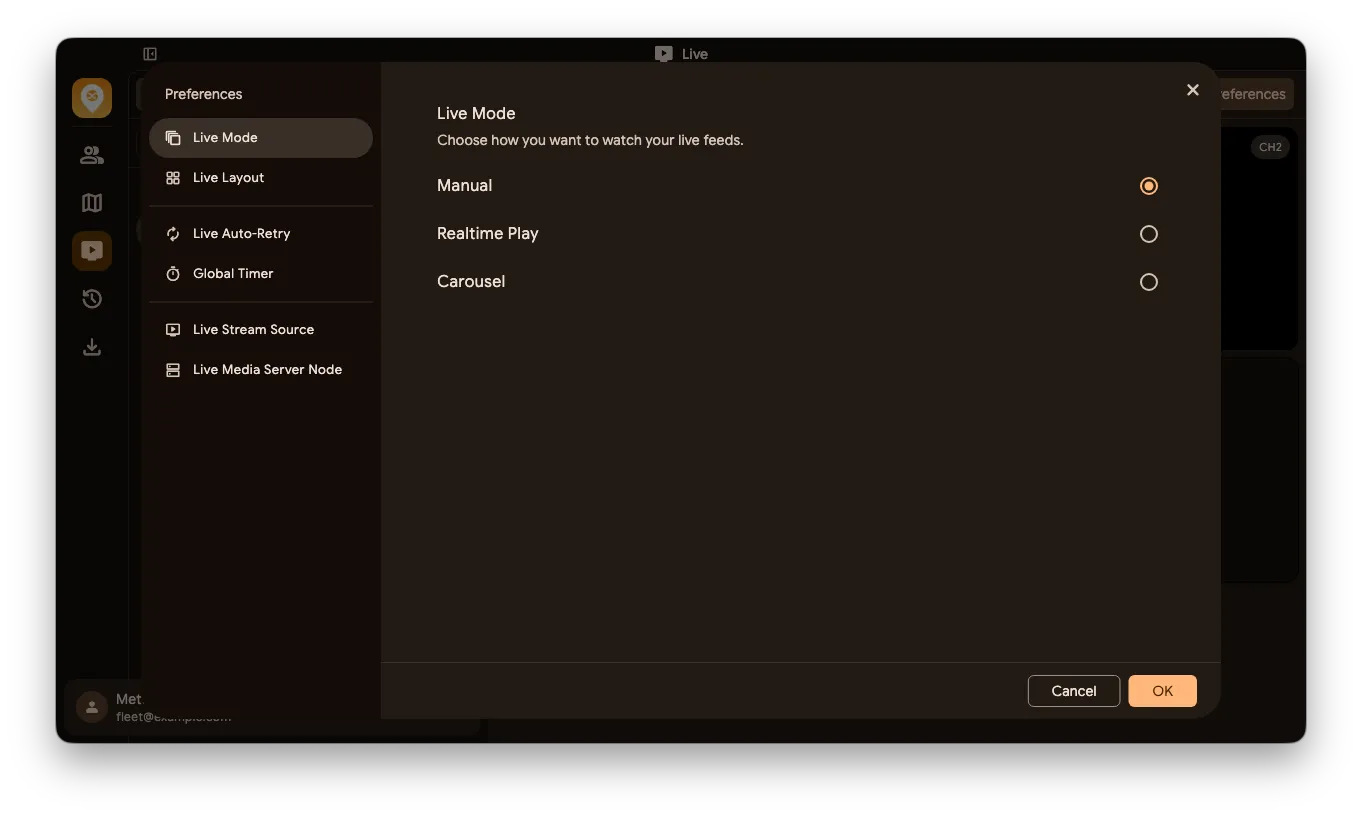
Section titled “Live Mode”Open Preferences at the top, select Live Mode and confirm your choice.
| Mode | Description |
|---|---|
| Manual | Add or remove live channels yourself |
| Realtime Play | Automatically show online devices, with newly online devices first |
| Carousel | Group channels by grid capacity and switch groups every 30 seconds; offline channels keep a placeholder |
Realtime Play and Carousel disable manual channel changes, grid layout changes and live fullscreen. Switch to Manual before making these changes.
Custom Grid Layout
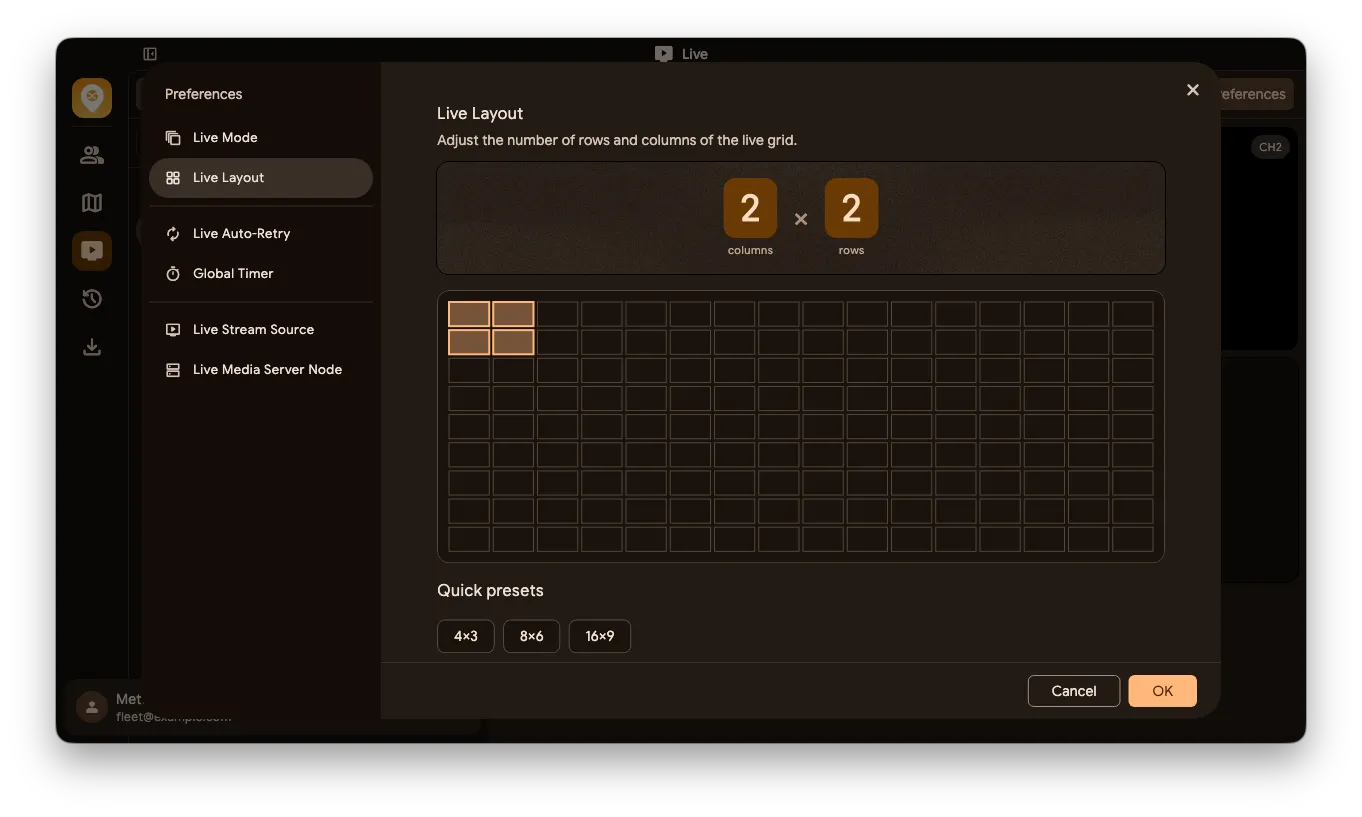
Section titled “Custom Grid Layout”In Manual mode, open Preferences and select Live Layout. Adjust the rows and columns or choose a quick preset. The layout sets the capacity of the grid below the pinned row.
Live Auto-Retry
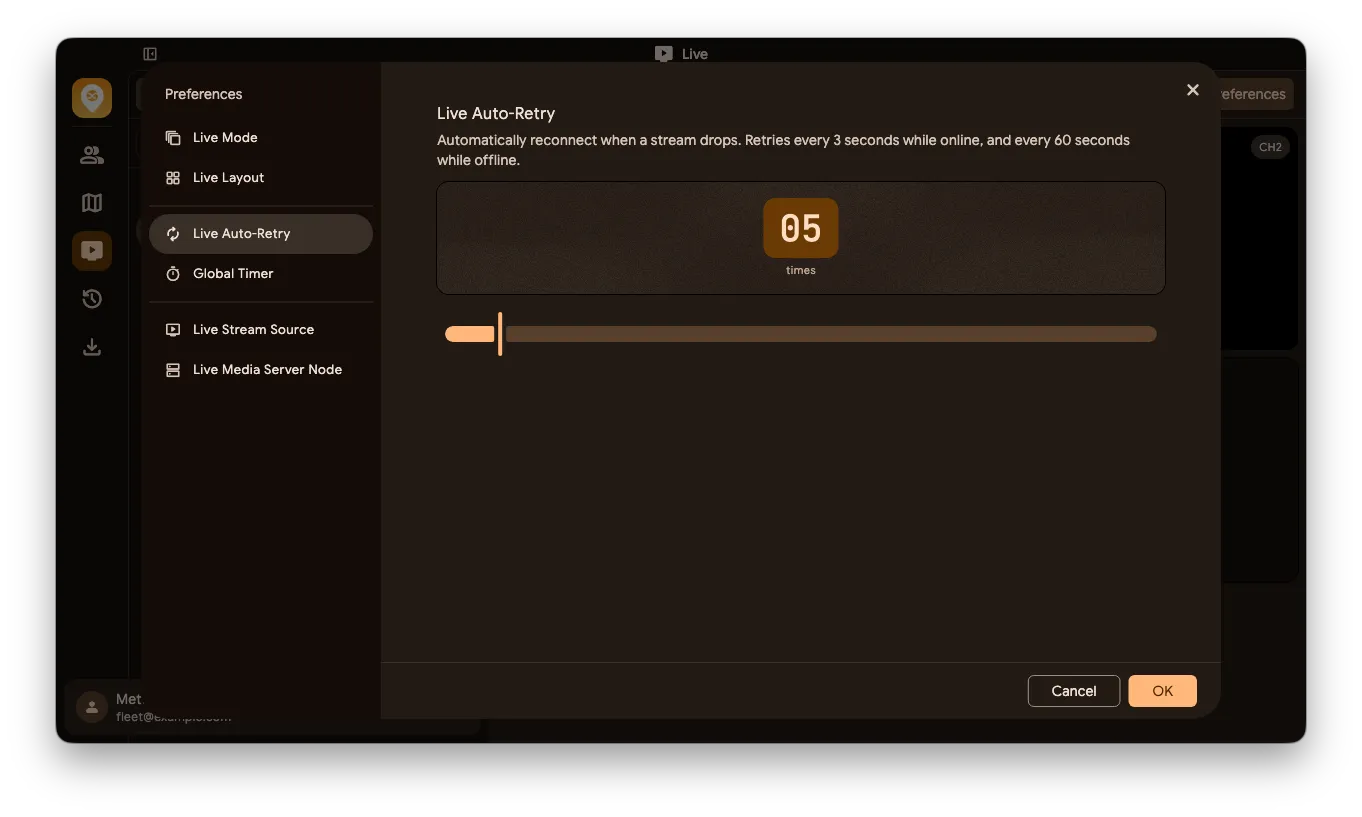
Section titled “Live Auto-Retry”Open Preferences and select Live Auto-Retry to set the number of reconnection attempts, from 1 to 60. The default is 5 attempts. Click OK to save. Retries run every 3 seconds while the device is online, or every 60 seconds while offline.
The channel shows reconnection progress or the failure reason. After automatic retries end, click Retry to connect again.
Watch Timer
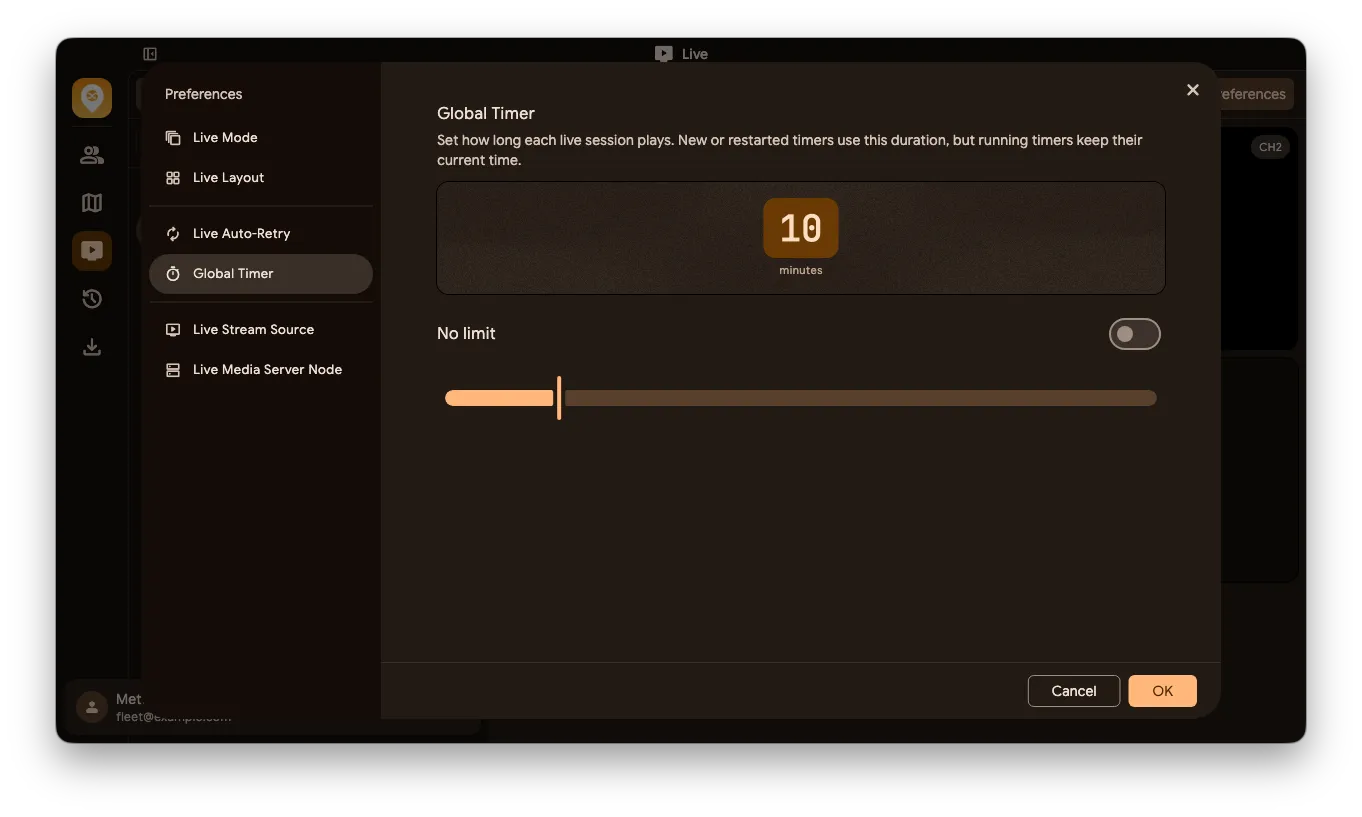
Section titled “Watch Timer”Open Preferences and select Global Timer to set the duration of each live session. Choose 1 to 60 minutes, or enable No limit to hide the countdown. The default is 10 minutes. Click OK to save.
New or restarted timers use the new duration. Running timers keep their remaining time. When a timer expires, use the prompt on the channel to stop or watch again.
Live Streaming Preferences
Section titled “Live Streaming Preferences”You can change the stream source and select a live media server node.
Stream Source
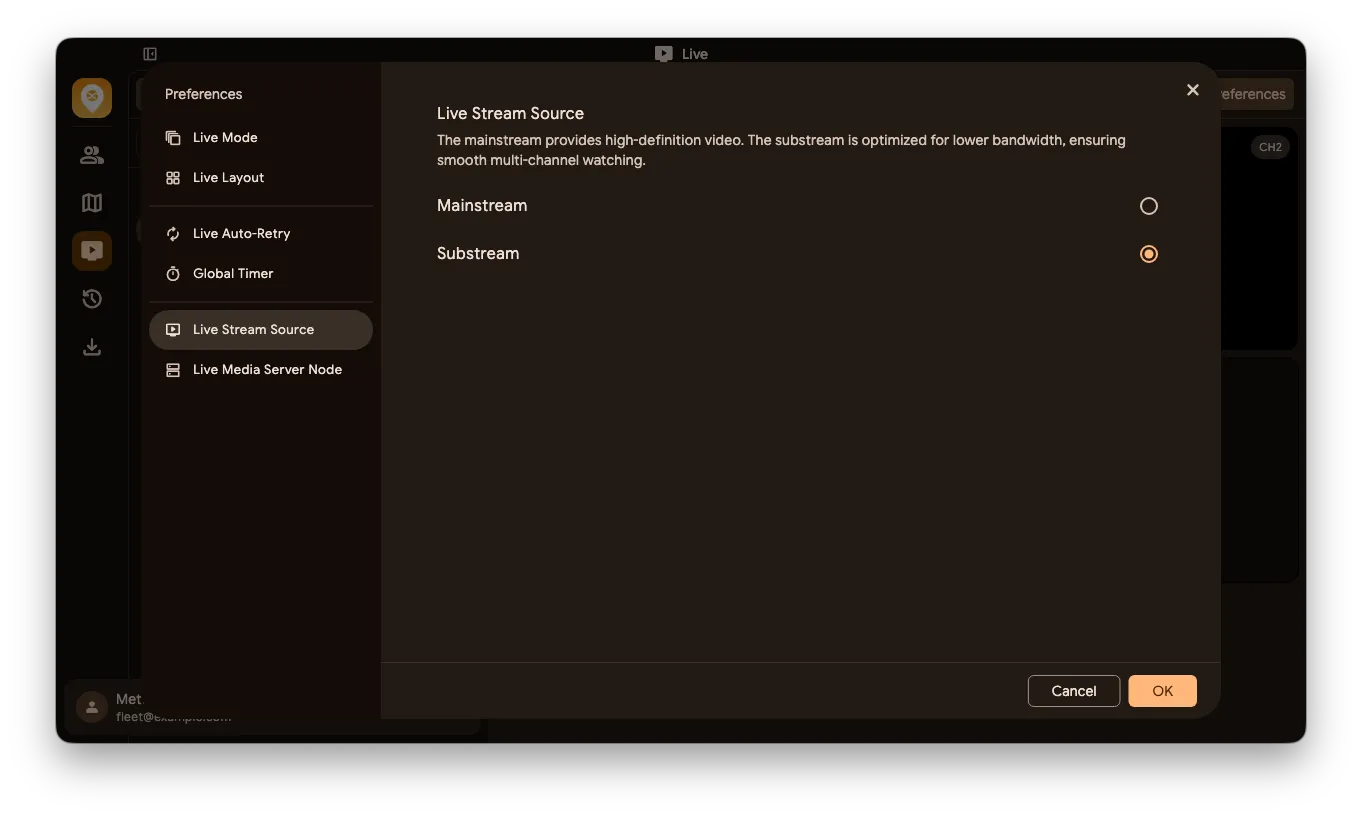
Section titled “Stream Source”The main stream provides higher video quality. The sub stream uses less bandwidth. Choose based on your connection and the number of channels you watch at once.
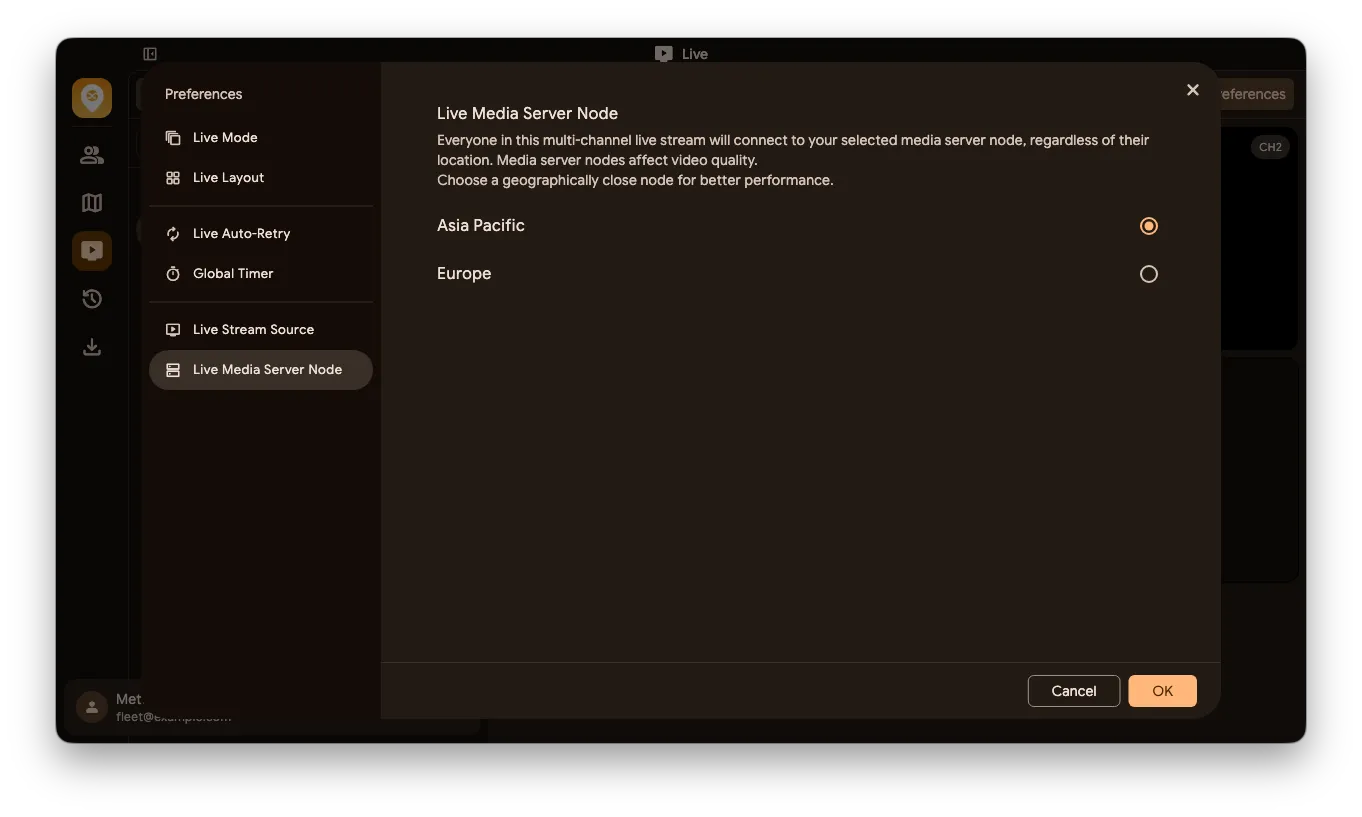
Live Media Server Node
Section titled “Live Media Server Node”Live channels use the media server node you select. Try a geographically closer node and adjust based on the connection. Live streaming and replay remember their selected nodes separately.
Playable Channels
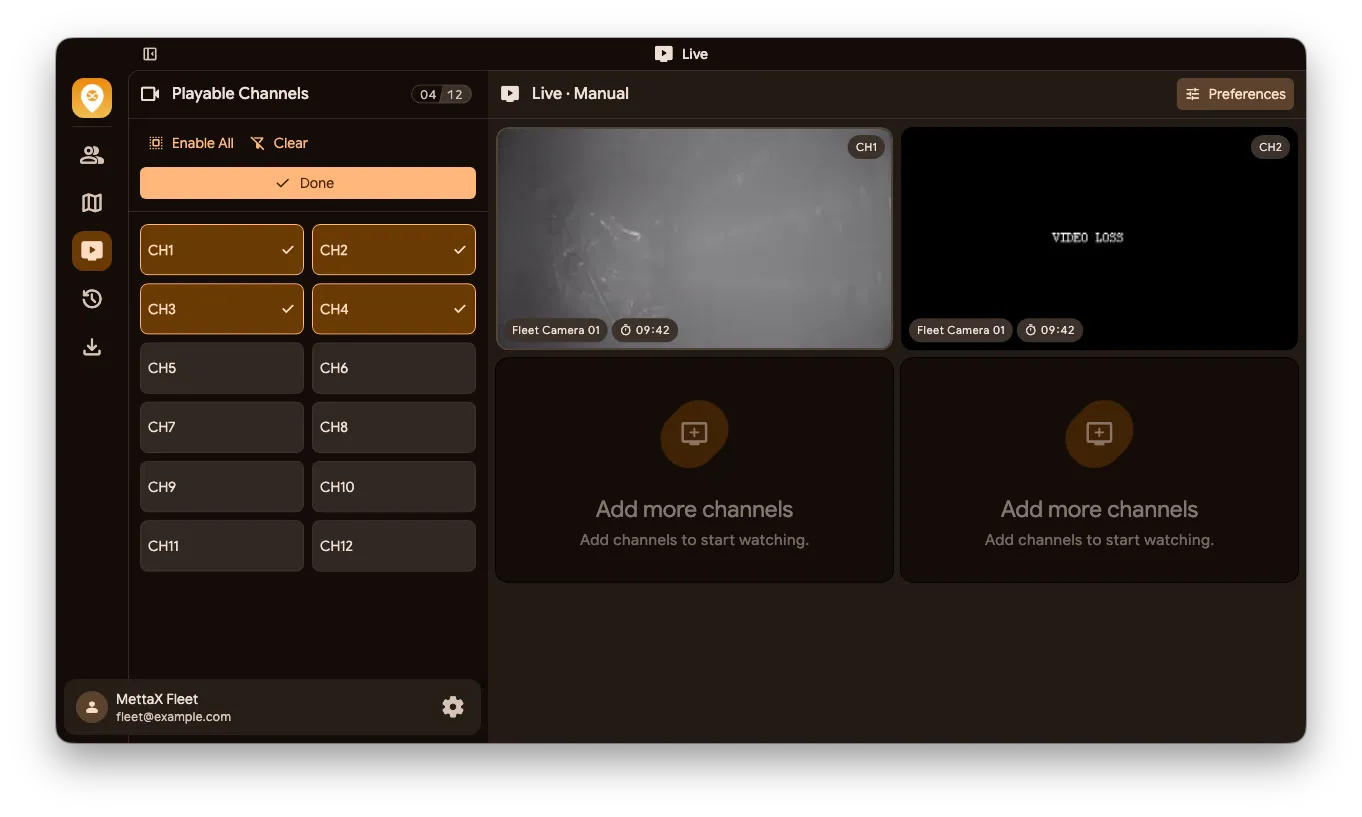
Section titled “Playable Channels”Click Channels above the device list to open Playable Channels. The enabled channels, CH1 through CH12, apply to both live streaming and replay.
Toggle individual channels, or use Enable All or Clear. Clear still keeps at least one channel enabled. Click Done to return to the device list. Disabling a channel in the manual queue or pinned row stops playback and keeps its position. Realtime Play and Carousel filter out disabled channels and rebuild the grid.
Multi-Channel Grid Streaming
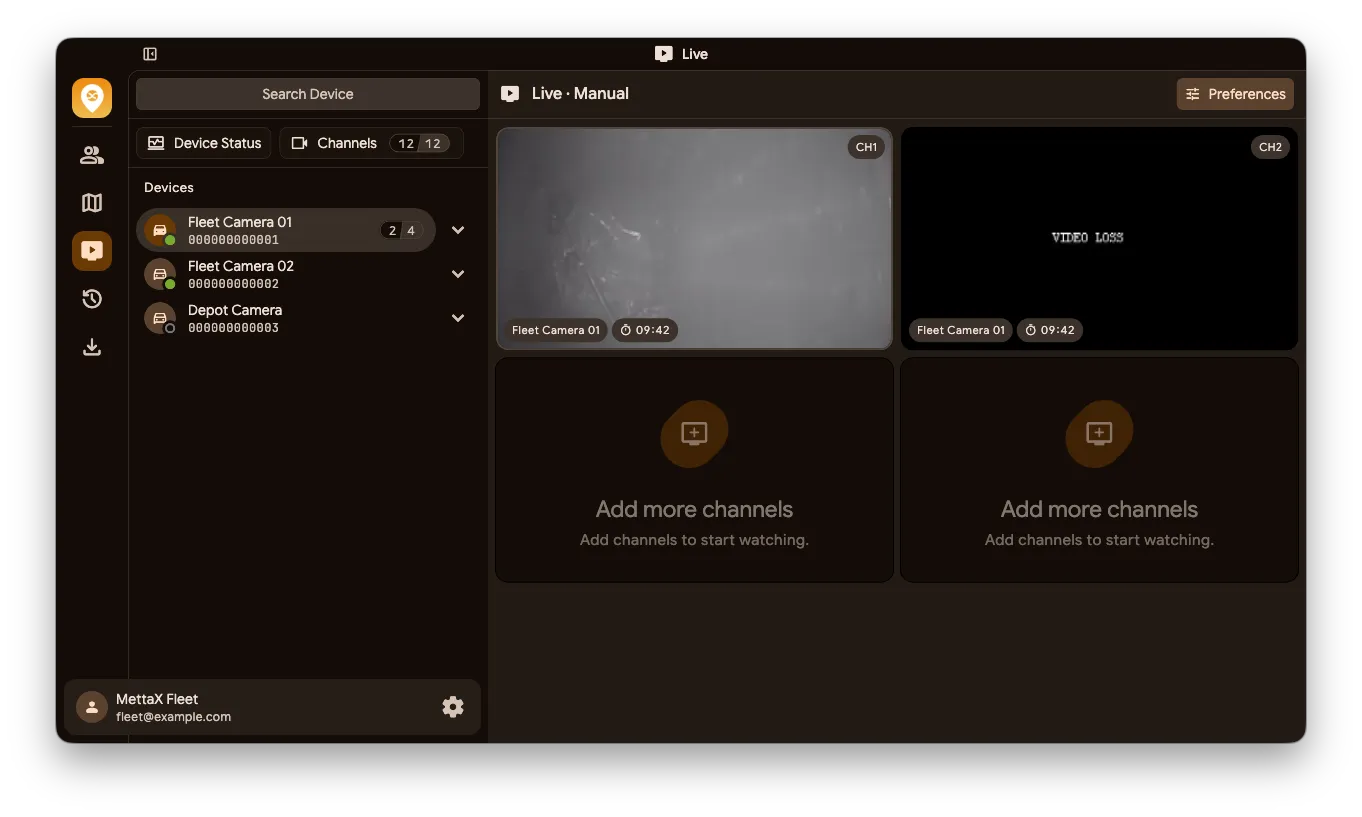
Section titled “Multi-Channel Grid Streaming”In Manual mode, expand a device and click the add button to add a channel to the grid. Click the remove button to remove it.
Click the device row’s play all channels button, or double-click the row, to add its enabled channels up to the number of free grid cells. Channels already playing are not added again.
Pinned Channels
Section titled “Pinned Channels”Click Pin on a channel to move it to the Pinned row above the grid. Other channels remain in the grid below. Each channel plays only once.
Click Unpin to return a channel to the grid. In Manual mode, if the grid is full, unpinning removes the channel from live streaming and displays a message. Pins apply to the current customer’s viewing session and are not saved as permanent favorites.
Live Privacy Masking
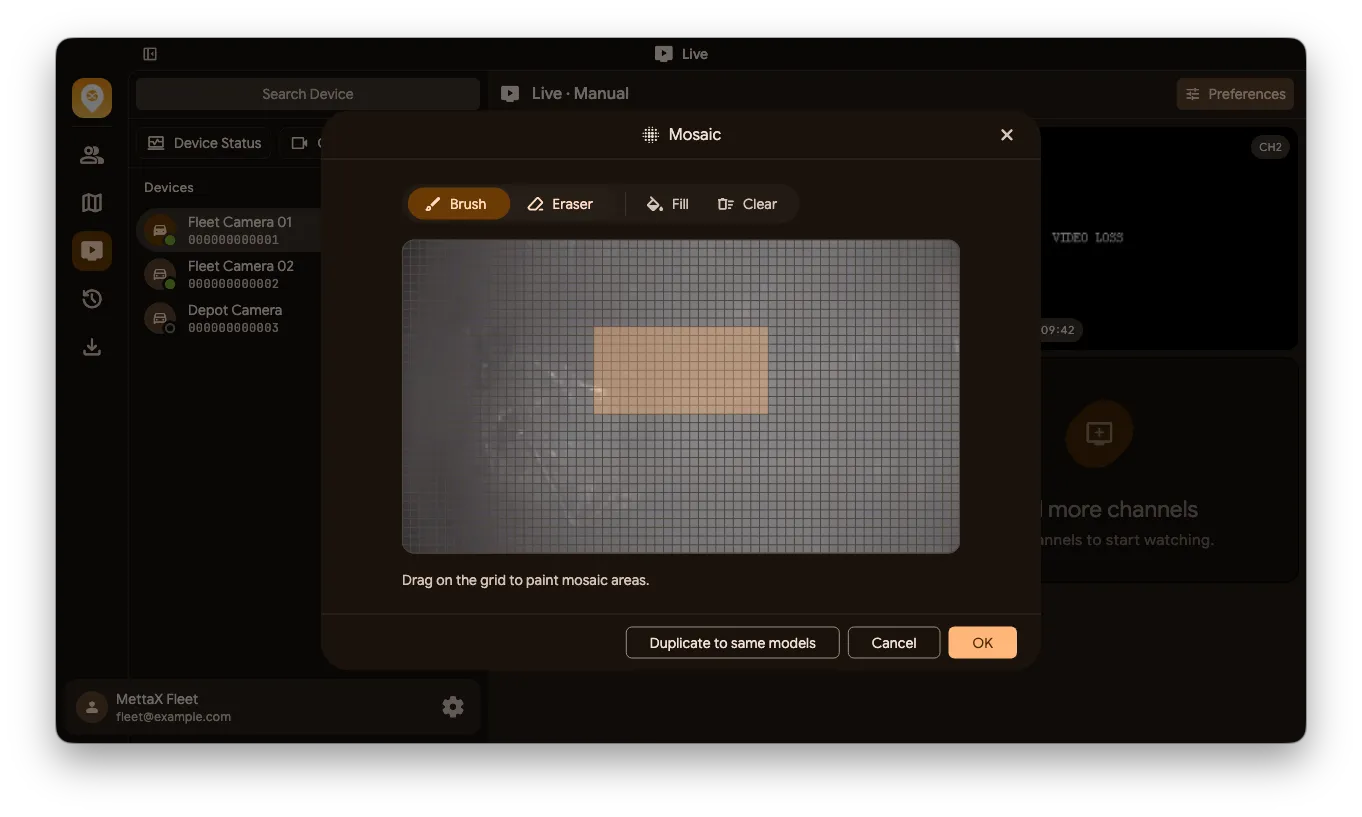
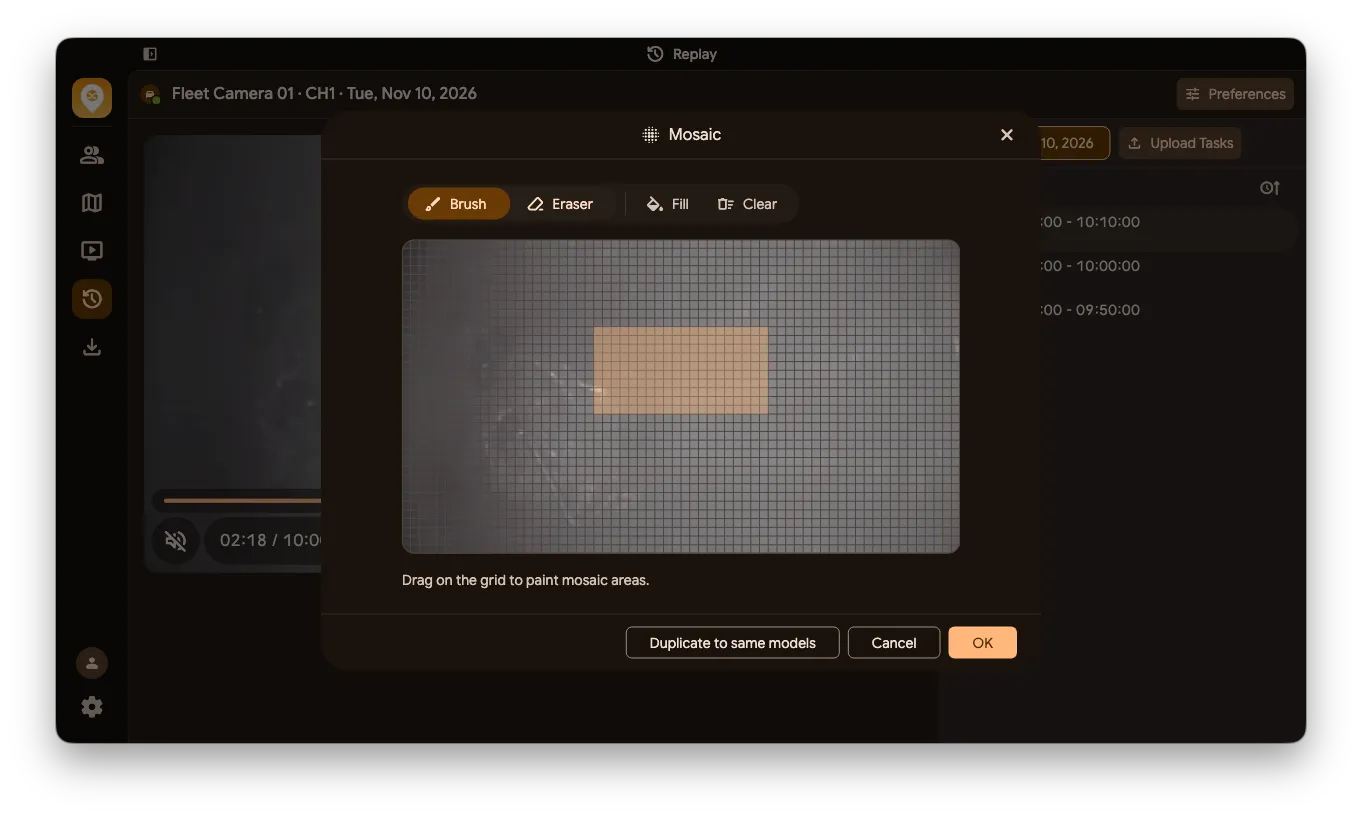
Section titled “Live Privacy Masking”Click the mosaic button to enter masking settings and draw areas on the screen that need to be covered. An eraser is available to remove masked areas. The masking configuration can be synced to other devices of the same model.
Video Replay
Section titled “Video Replay”Select a device, channel and date to find and play recorded video segments.
Watch Replay Segments
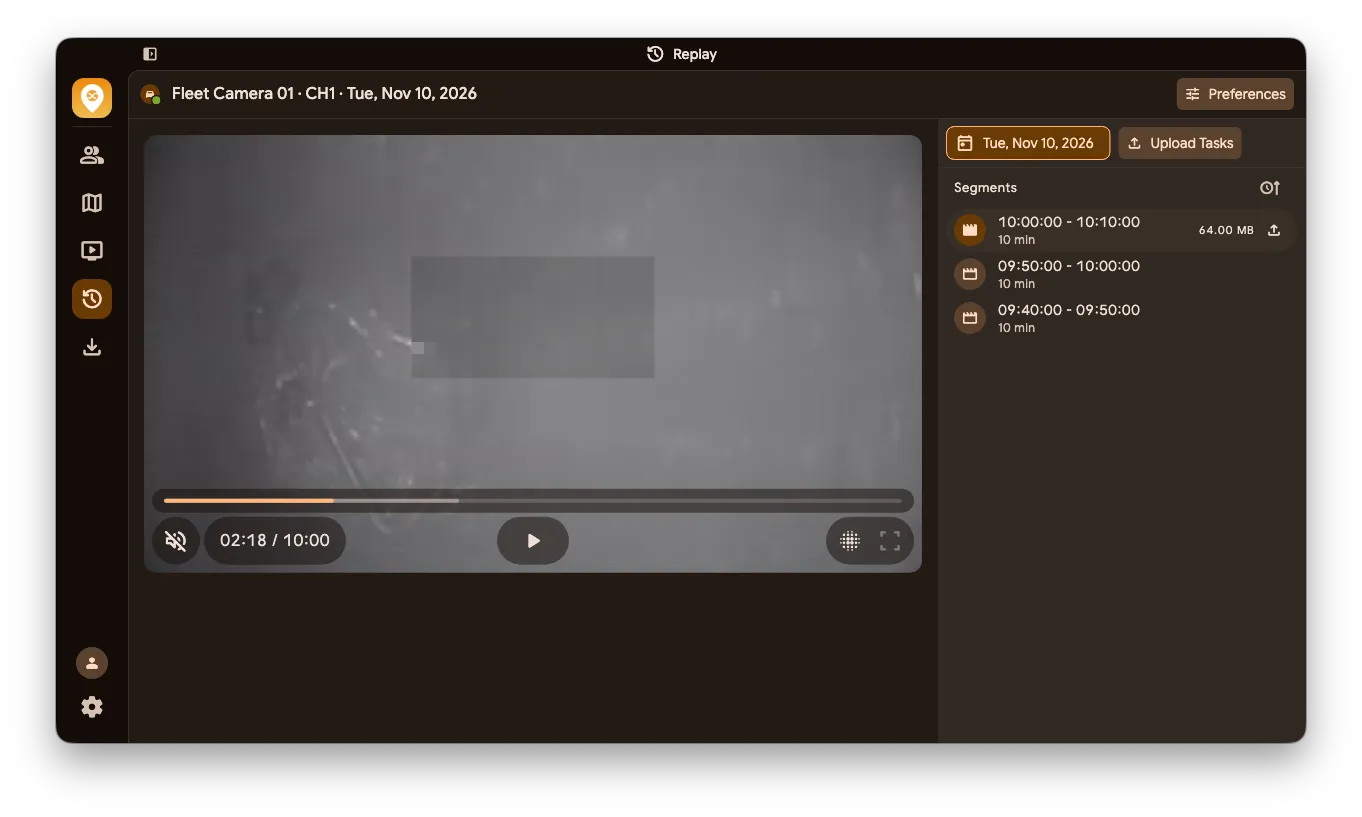
Section titled “Watch Replay Segments”After selecting a device and channel, use the date picker to navigate to a specific day. All replay segments for that day are listed on the right.
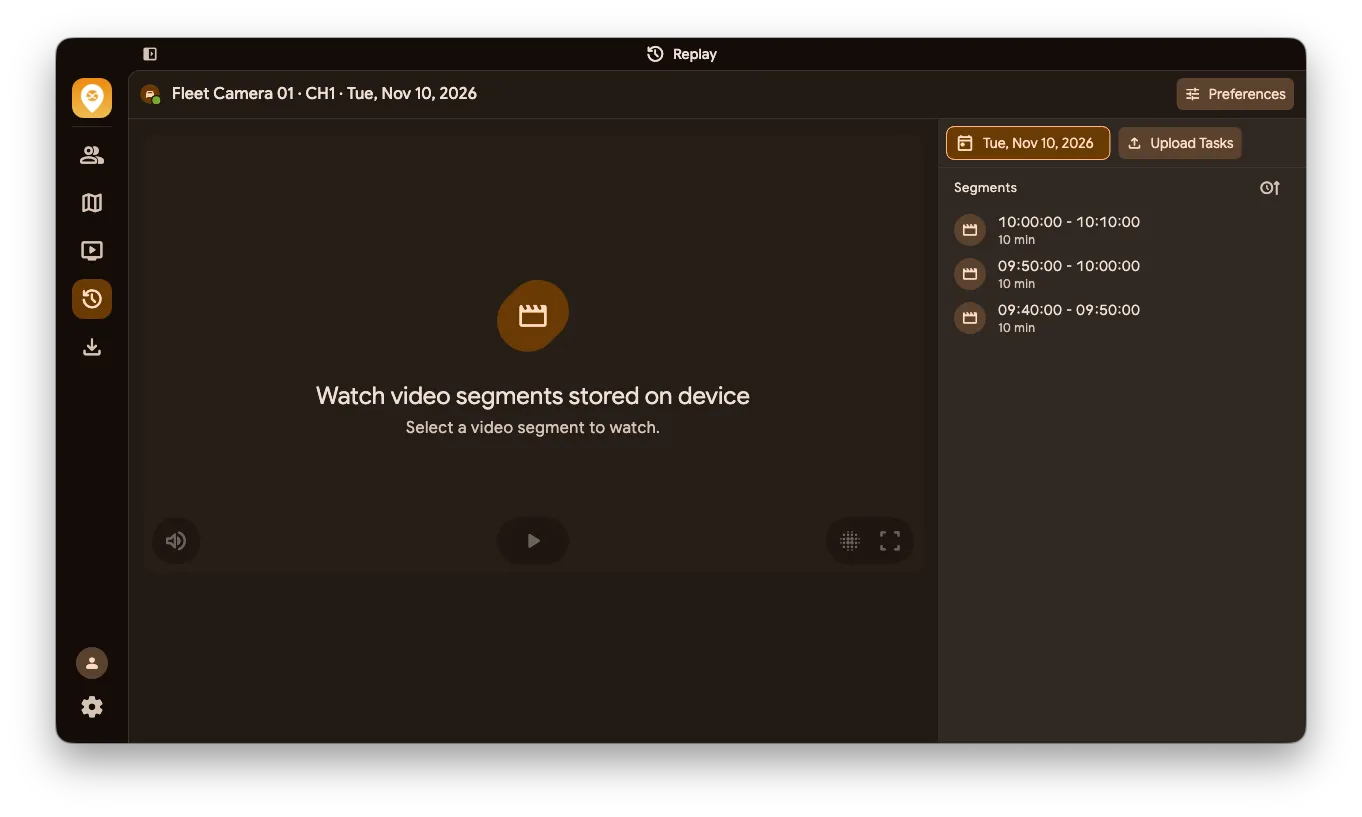
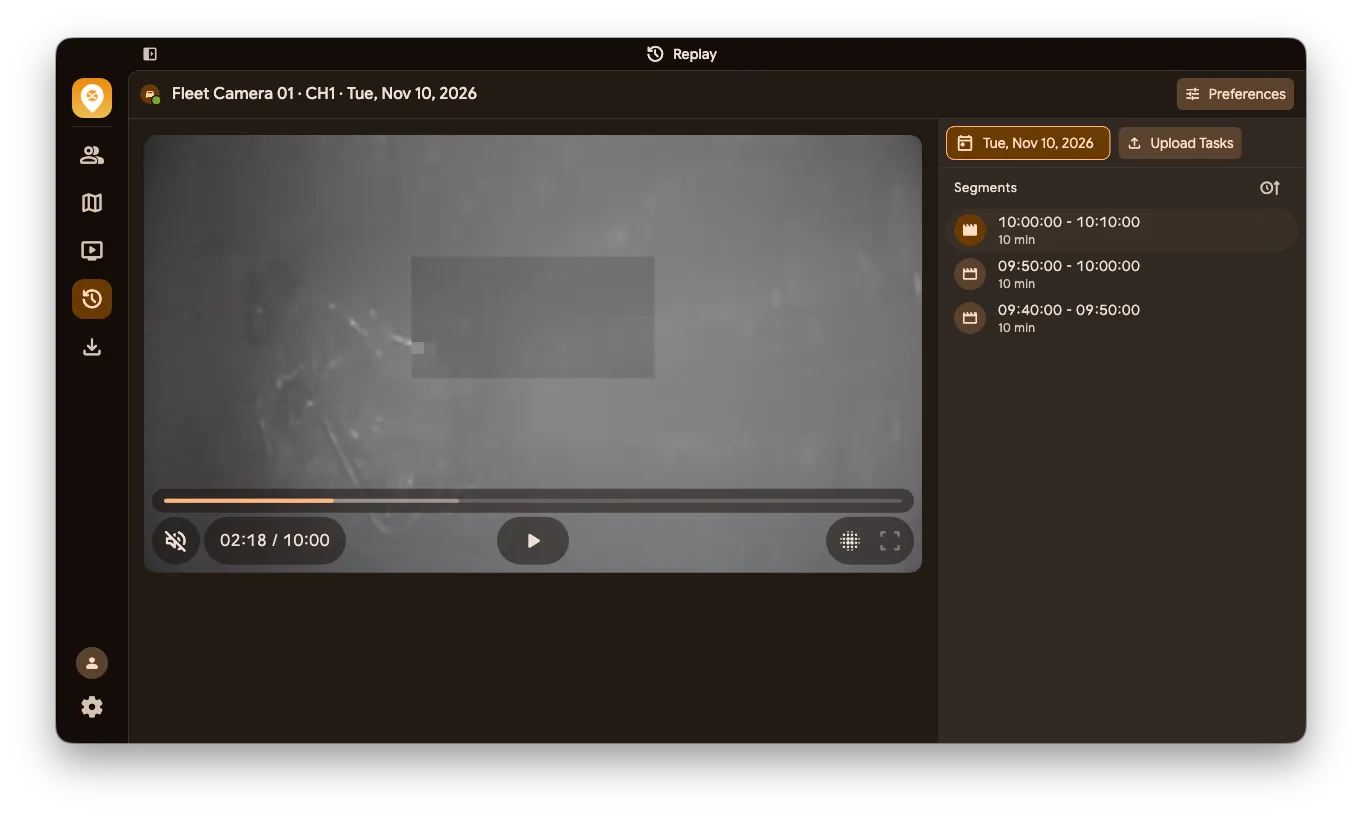
Replay Player
Section titled “Replay Player”Supports play, pause, volume control, progress scrubbing and fullscreen viewing.
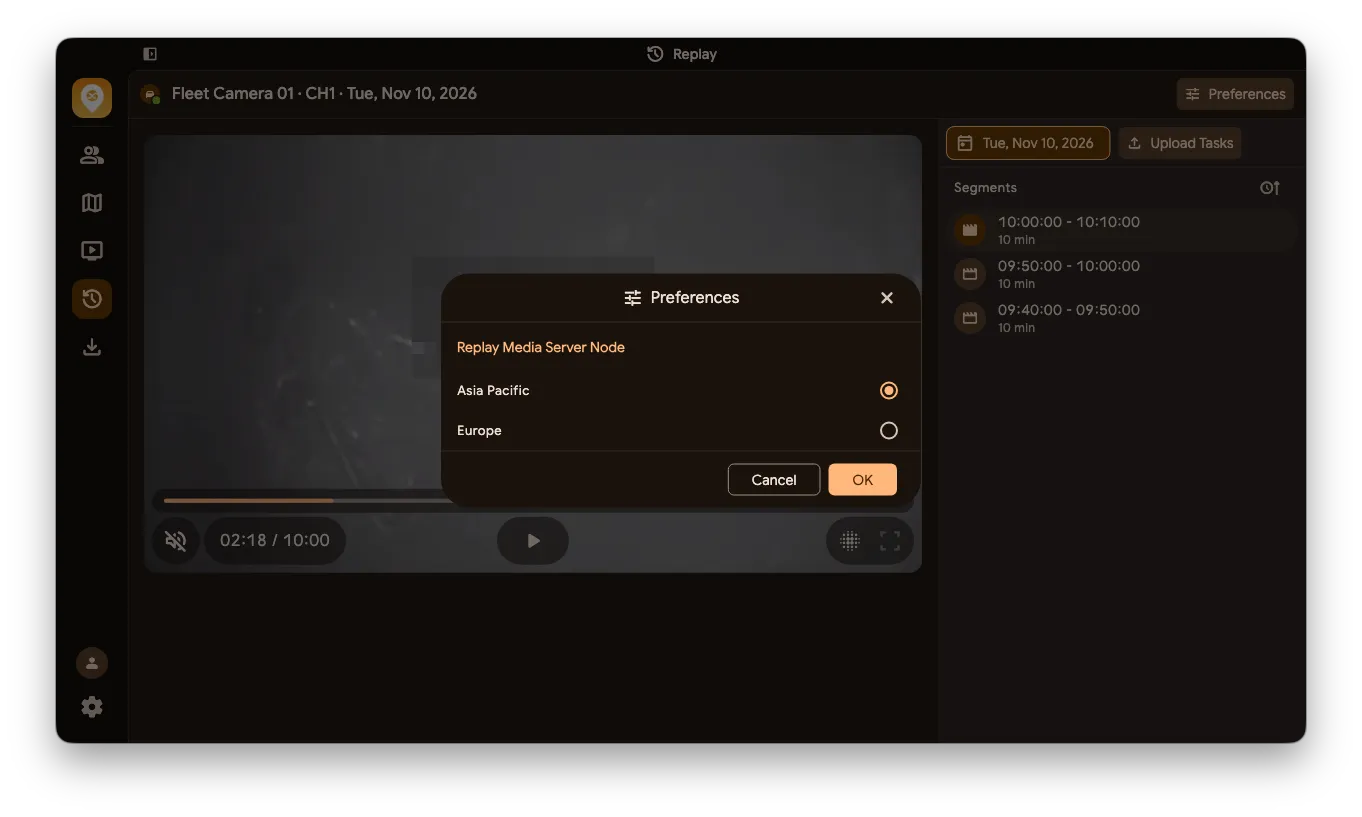
Replay Preferences
Section titled “Replay Preferences”You can select the media server node used for replay. This selection is saved separately from the live streaming node.
Replay Privacy Masking
Section titled “Replay Privacy Masking”Replay also supports masking, with the same operation as live privacy masking.
Cloud Upload for Replay
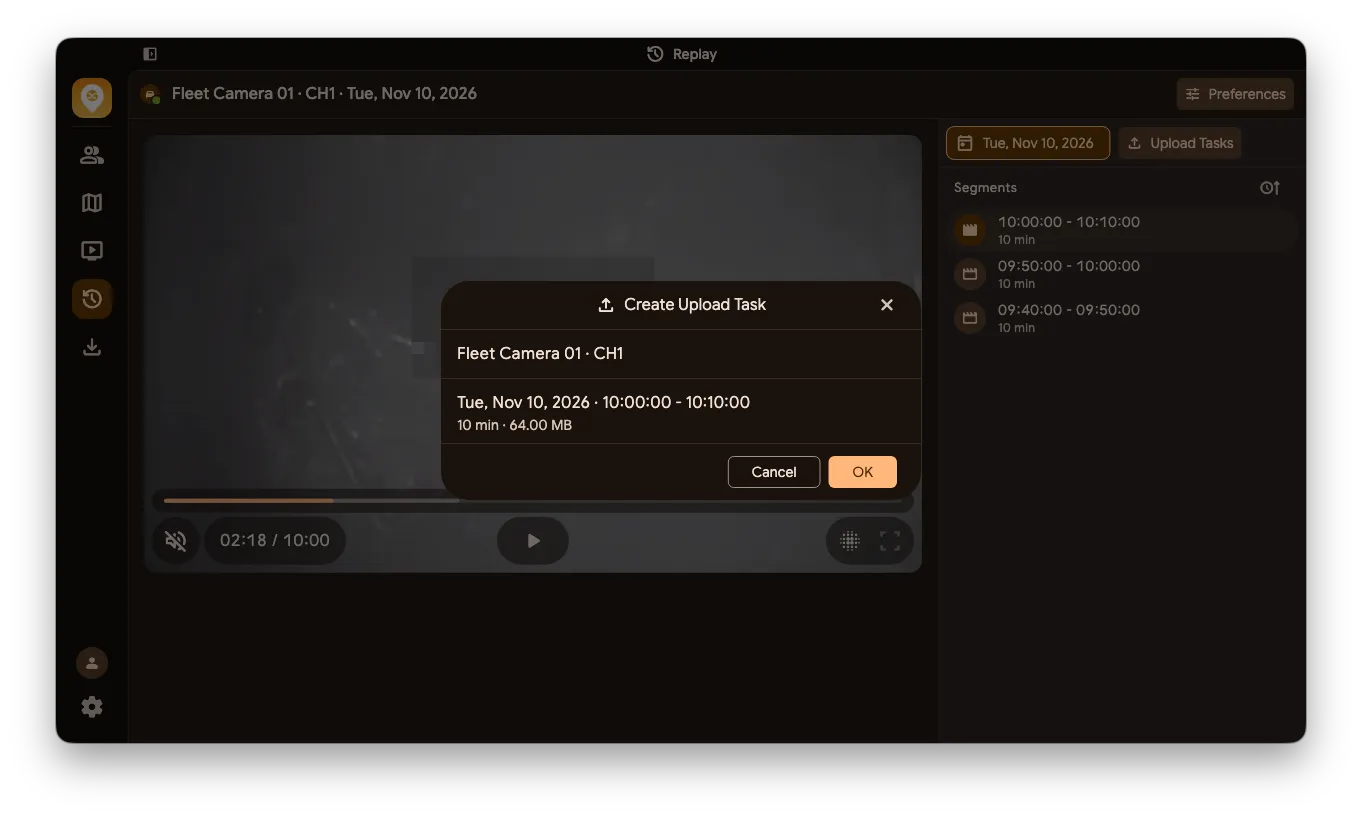
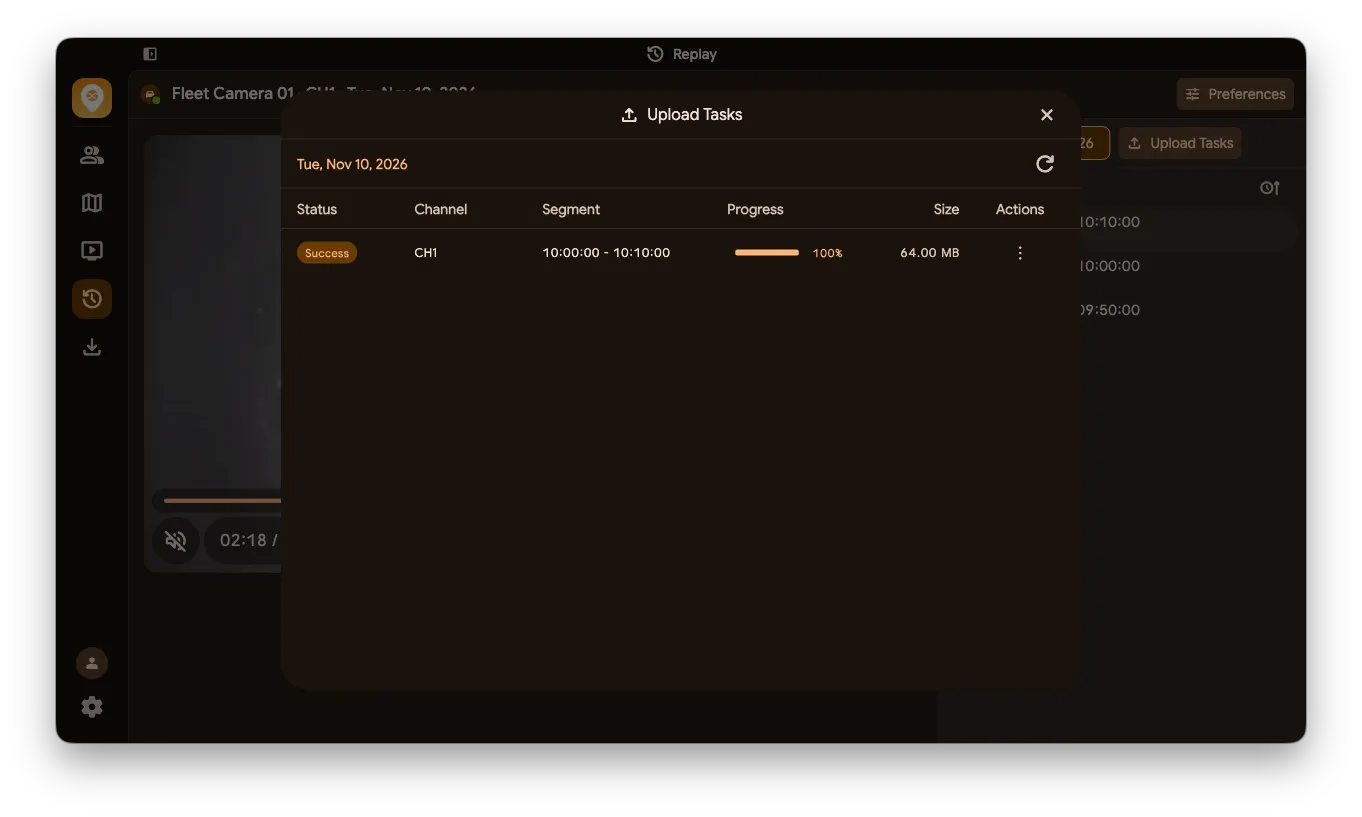
Section titled “Cloud Upload for Replay”You can upload a replay segment to the cloud. The upload task list shows whether it is waiting for a response, uploading, successful, failed or stopped. Creating a task does not mean the upload has finished.
-
Click the upload button next to the replay segment.
-
Create an upload task.
-
After the upload task is created, it appears in the upload task list where you can view the upload progress and status.
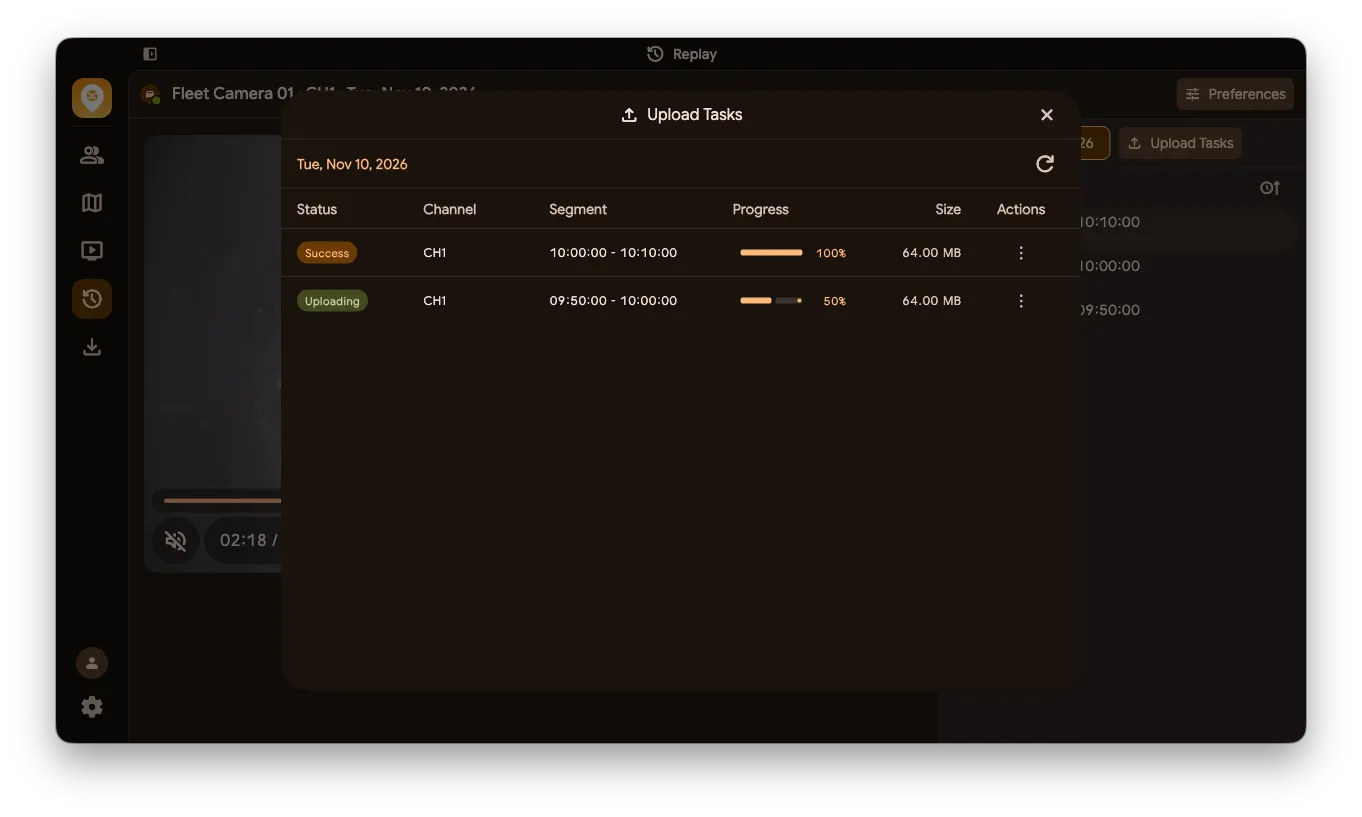
Download and Copy Link become available after the upload succeeds and a link is ready. You can cancel an upload in progress, or remove a failed or stopped task.
Download Manager
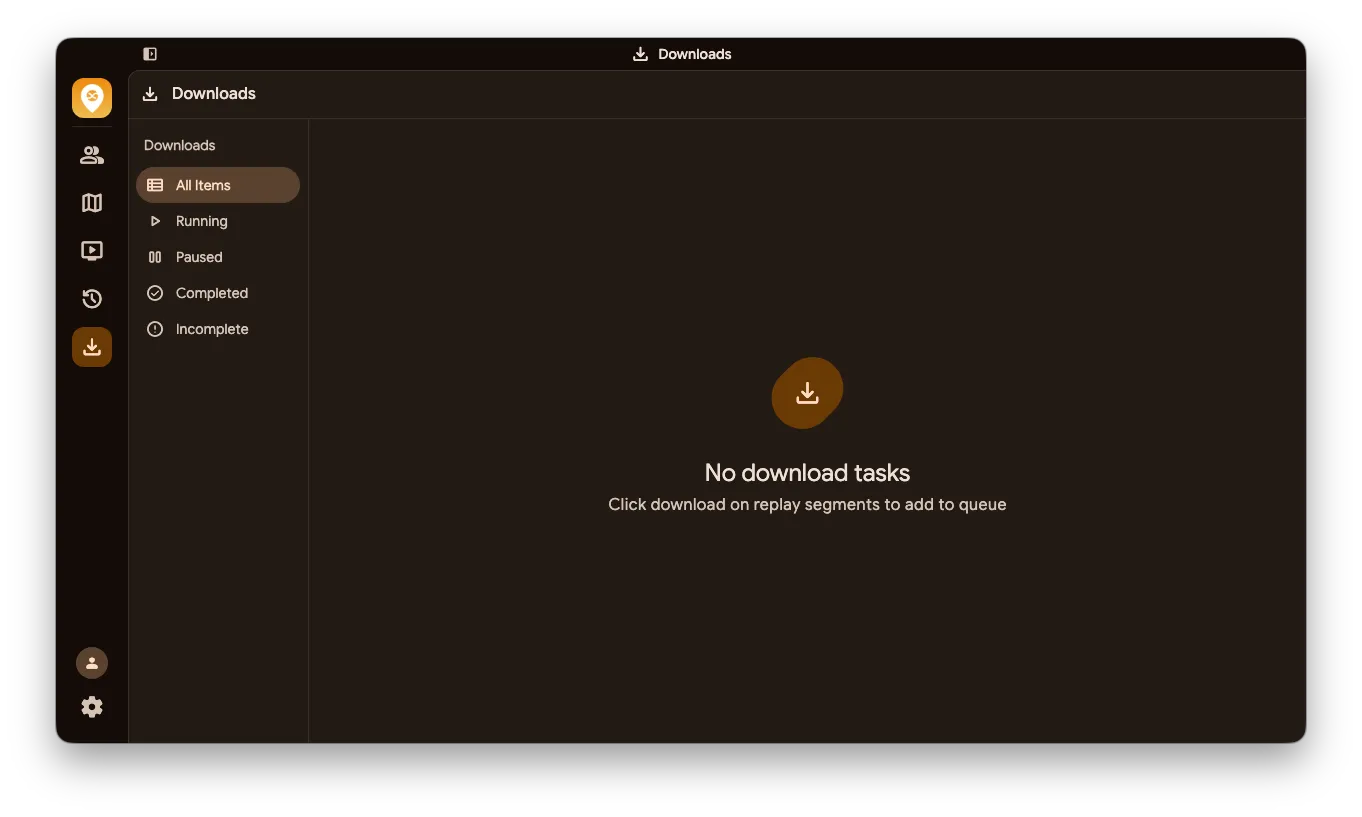
Section titled “Download Manager”A built-in background download manager with persistent task states.
Replay Segment Download
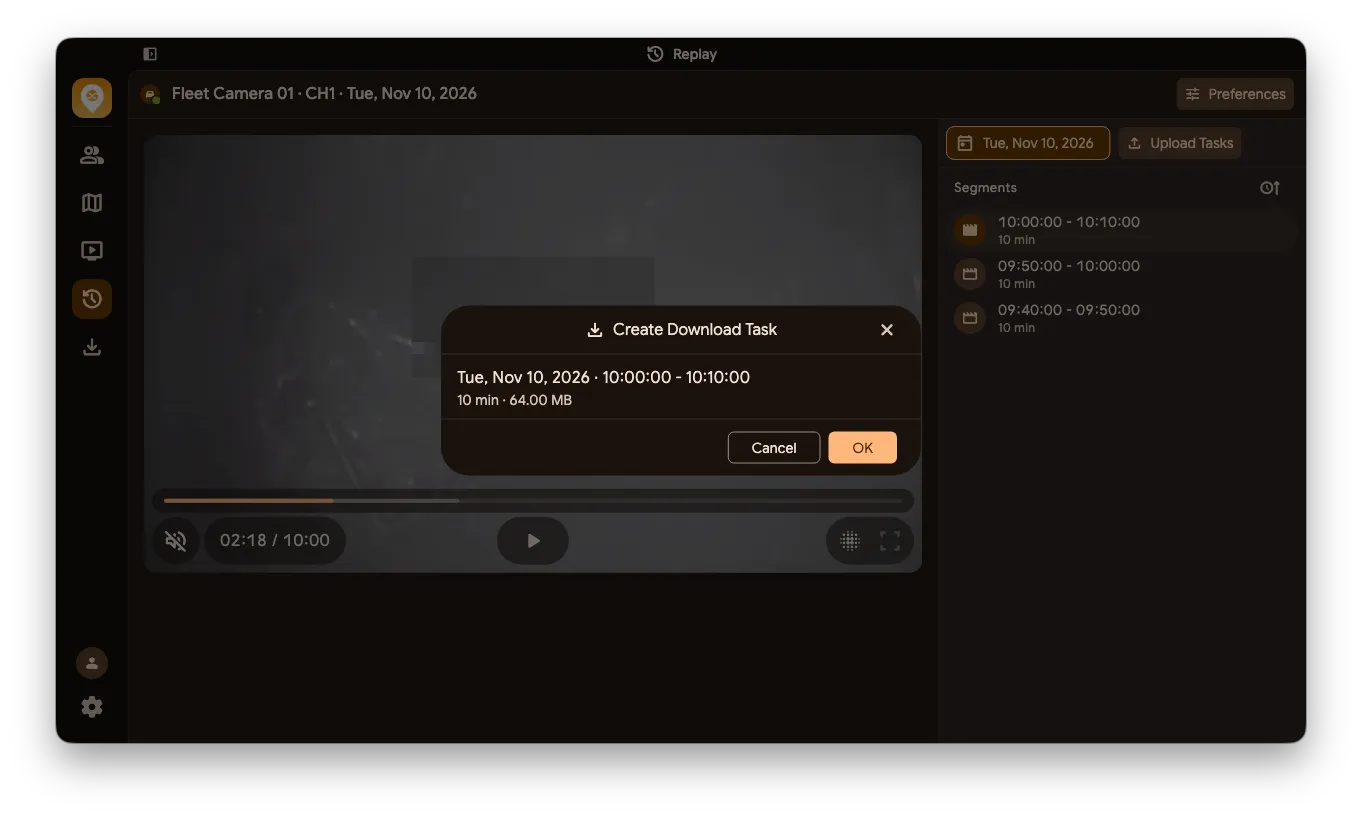
Section titled “Replay Segment Download”Create download tasks from the replay list, and files are saved locally. Downloads run in the background without affecting other operations.
-
In the upload task list, click Download for a successfully uploaded segment.
-
Create a download task.
-
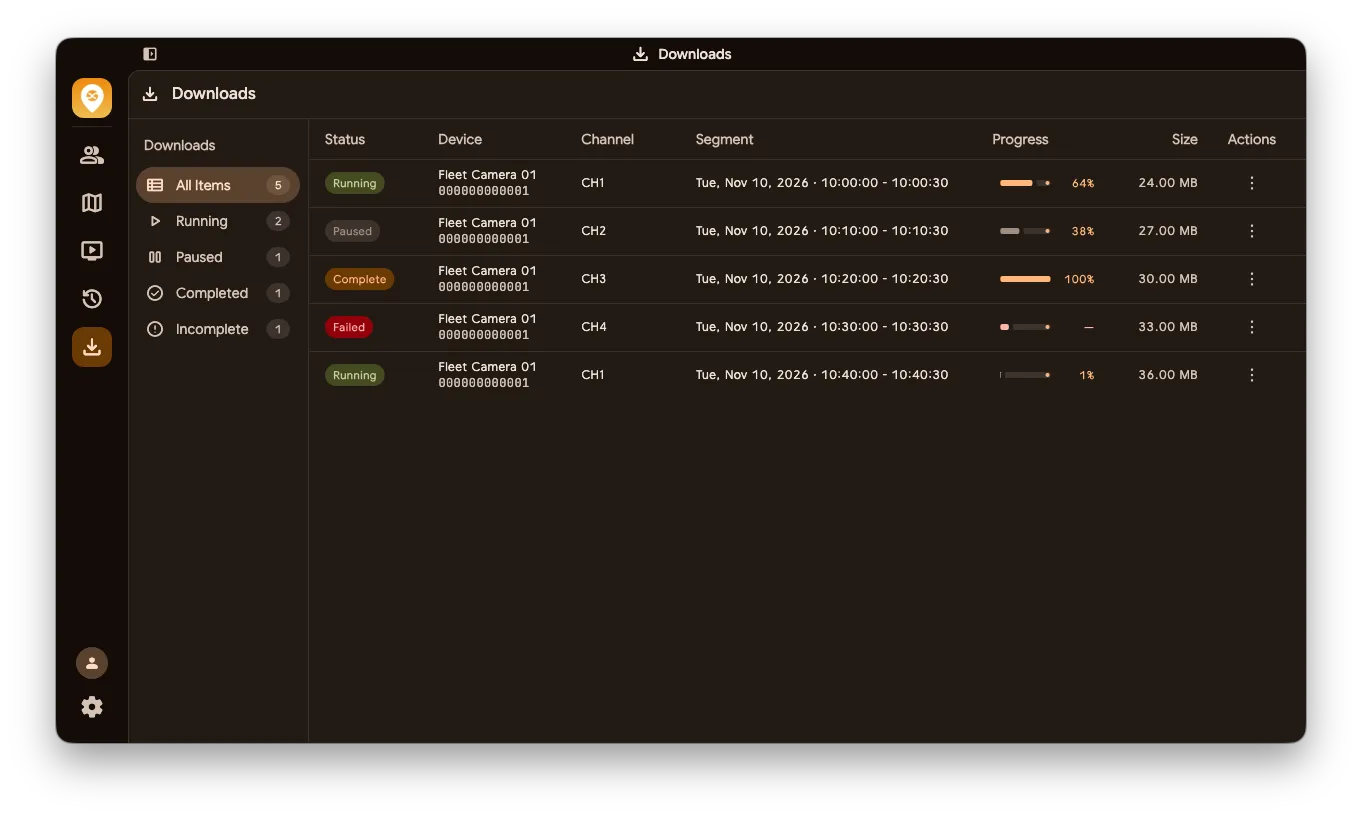
After the download task is created, it appears in the download task list where you can view the download progress and status.
Download Task Management
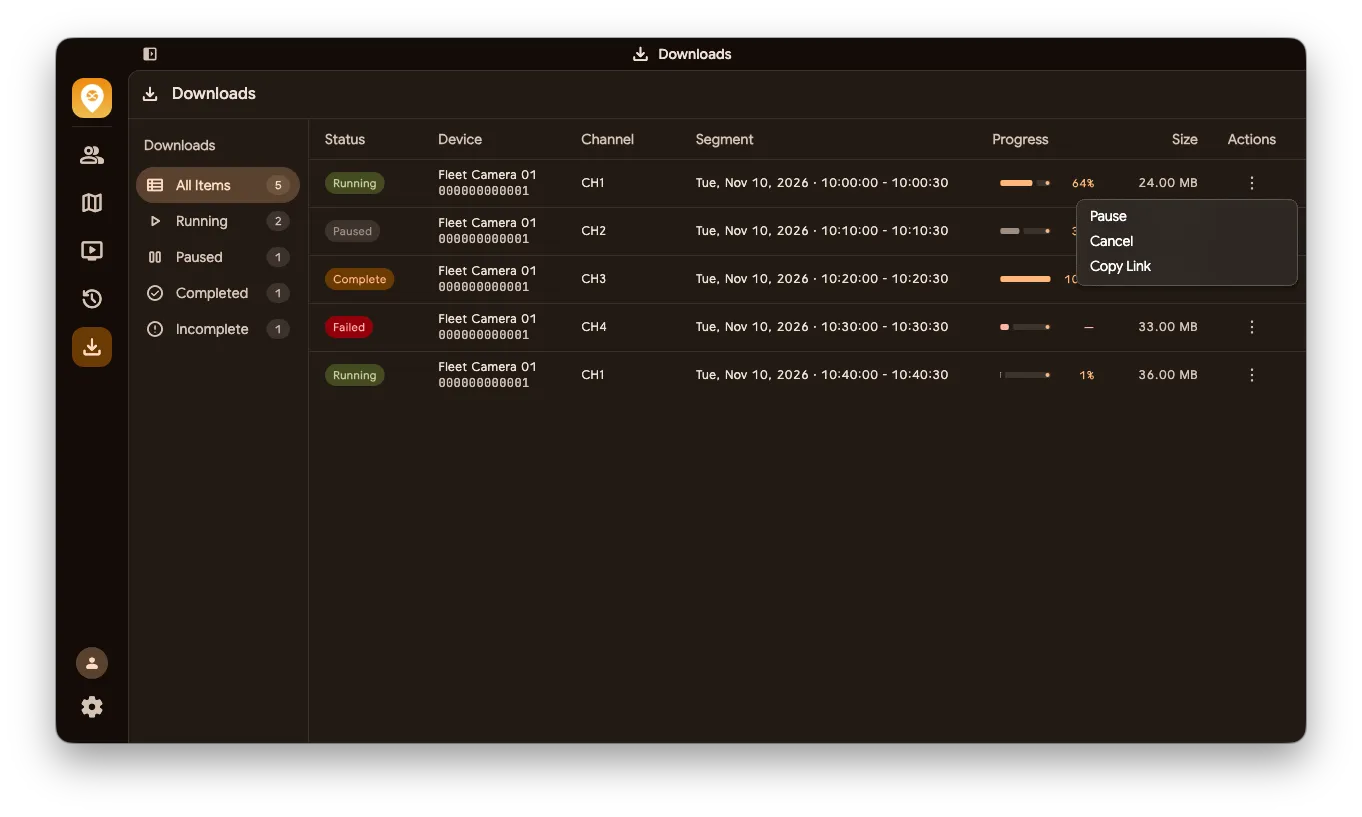
Section titled “Download Task Management”Filter tasks by All Items, In Progress, Paused, Completed or Incomplete. Depending on the task state, you can pause, resume, cancel, copy the link or remove the task.
After downloading and transcoding finish, open the file or show it in your file manager.
Download Privacy Masking
Section titled “Download Privacy Masking”If the device channel has masking configured, the downloaded video is transcoded to apply the mask. Wait for transcoding to finish before opening the video.
User Settings
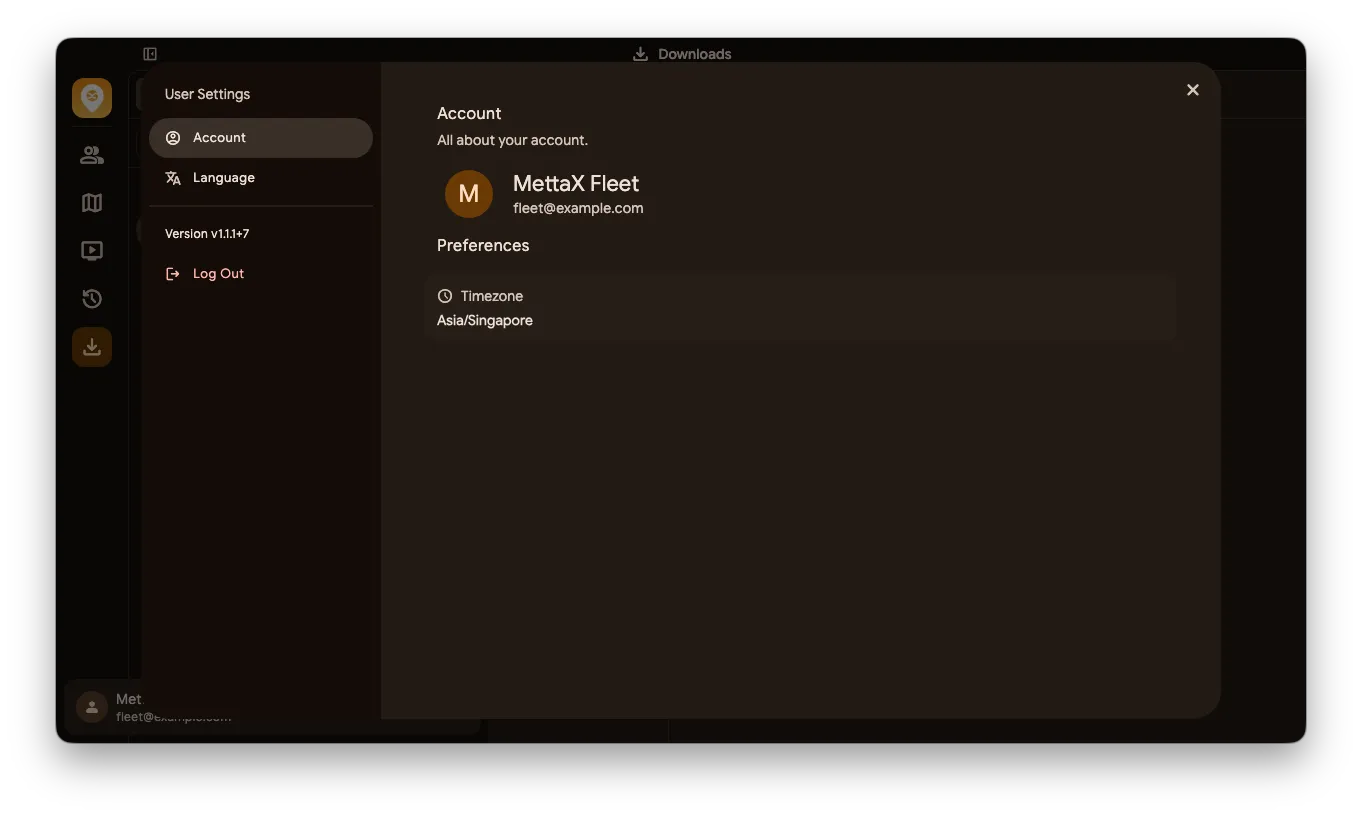
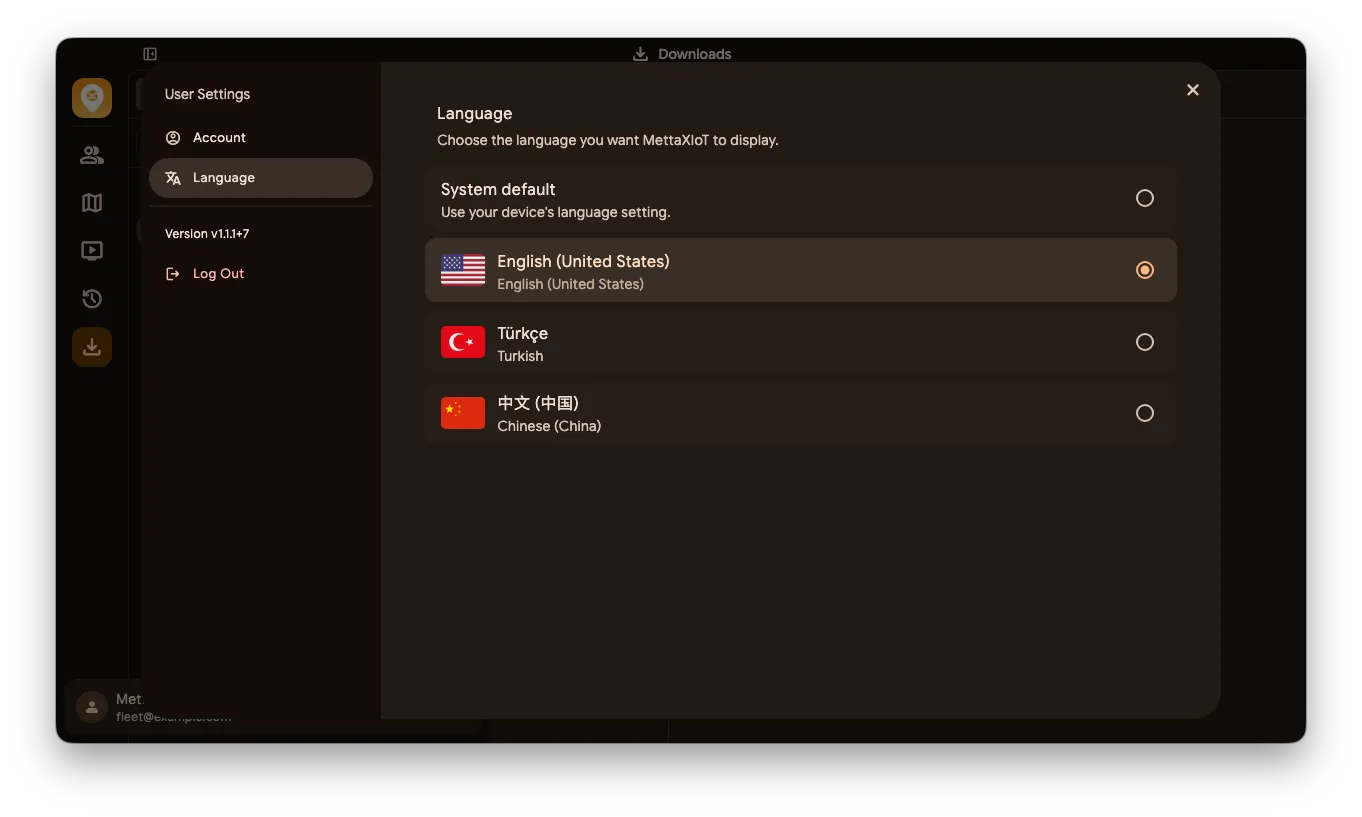
Section titled “User Settings”Click user settings at the bottom to view account information, switch languages or log out.
Account Information
Section titled “Account Information”Account information includes basic details such as username, contact email and platform time zone.
Switch Language
Section titled “Switch Language”The client supports multiple languages. The interface updates automatically after switching. Currently, English, Turkish and Chinese are supported.
System Tray
Section titled “System Tray”Supports window management and stays in the system tray.
Version Update
Section titled “Version Update”Built-in version checking prompts you when a new version is available. If an update is required, click Update Now and complete it before continuing.
Multi-Language
Section titled “Multi-Language”Supports multiple languages. Currently, English, Turkish and Chinese are supported.